

This little guy is either called a "gossip table" or "telephone table" depending on who you talk to. They are popular retro pieces in the upcycling world.
Now, my parents have one in the kitchen but my dad bluntly said, "You aren't touching it." My response, "Okaaay, and why do you say it that way?" Come to find out, that telephone table was the first piece of furniture my Grandma and Grandpa Reed bought together as a married couple! So there are some pieces you just don't touch for sentimental reasons. (Don't worry dad, I won't touch your hutch either!)
So how did I get my hands on this one? I have been frequenting Vintage Seasons downtown Buhler and have became friends with the owner. We were talking and she said she would help me out by keeping an eye out at auctions, stores, and garage sales for a telephone table! Less than a week later... this is what showed up for me:

Game Plan:
Sand down the top to get rid of pencil drawings, paint it green, and reupholster the cushion! Easy enough right? Mmhmm.
Sand down the top to get rid of pencil drawings, paint it green, and reupholster the cushion! Easy enough right? Mmhmm.

Prepping List:
Gossip table with cushion removed
Bonding Primer
Paint Brush
Paint for the inside of the gossip table
Paint for the rest of gossip table
Fabric
Staple Gun
Gossip table with cushion removed
Bonding Primer
Paint Brush
Paint for the inside of the gossip table
Paint for the rest of gossip table
Fabric
Staple Gun

The first step I always do is use Bonding Primer. This "paint" is such a time saver! No matter the type of wood, stain, or finish it will adhere to what is already there. Once it dries it seems to just grab ahold of the paint where you want it!

After priming the ENTIRE piece it is time to do the inside black, or cracked pepper, with two coats! Normal people would probably use tape to keep the paint from going over the little edge. Me, I don't do well with tape or stencils so I do it by hand. The secret to it is the little wet paper towel you see over the back. If I do get it over where I want it I immediately swipe it away.
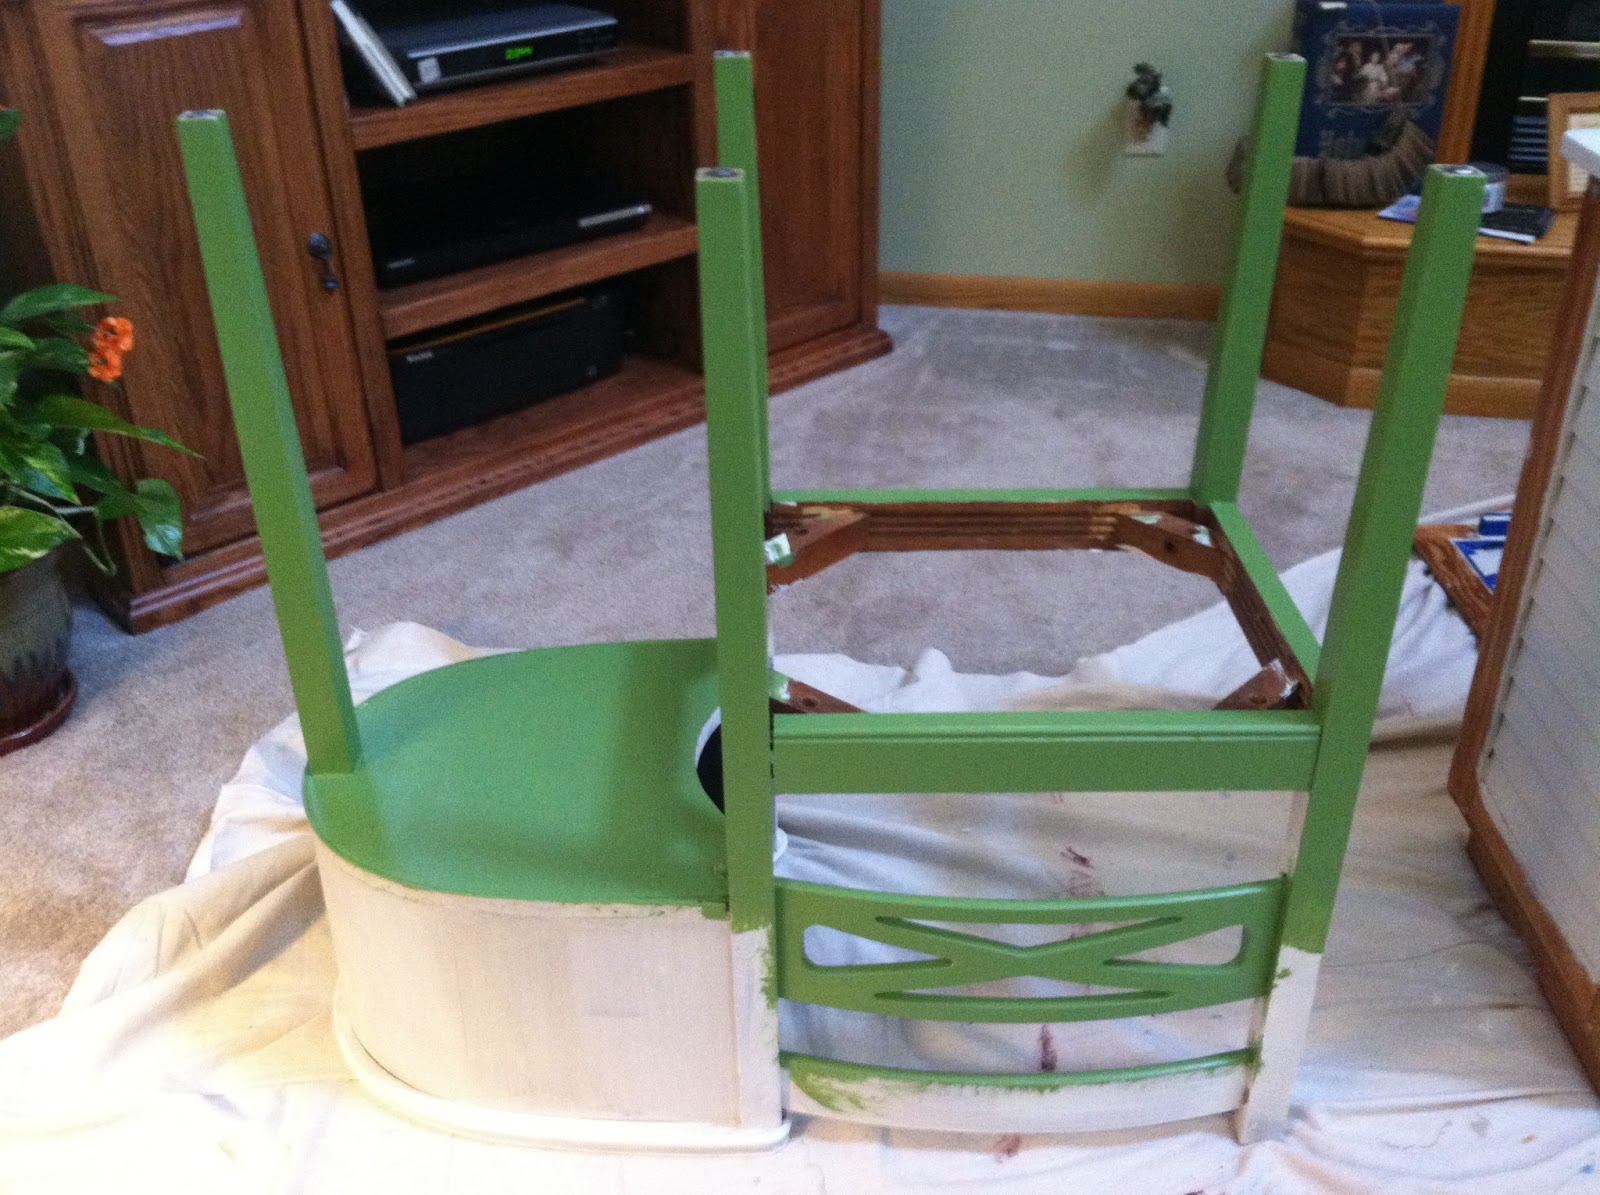
More proof I am backwards is how I like to turn the piece over to do the bottom and undersides of boards first. In the "X" that makes the backrest of the chair, I used a smaller brush. Oh, and toothpicks where the paint gathers in the little corners... which drives me CRAZY! This coat of green gets two coats or whatever it takes to get it covered.

Turned it over and did two coats while it was right side up! Once again with the little brush and toothpicks.

Time to reupholster the cushion. Isn't the old vinyl one just lovely? It's even more gnarly in person. Surprisingly it was very easy with no need to measure, because it was just a square! What a relief. So I just laid the fabric I had chosen (after contemplating in their isles for an hour) over the old vinyl piece and cut it to size. I don't have pictures of the how we stapled it down underneath, but there is a method to the madness that dad taught me along the way. Fold it over, staple, fold it again, staple again, open it up, make a triangle, staple it down. Makes sense, riiiiight? I will see what I can do about getting those steps in a tutorial sometime, sorry.

Here is a close up view of the completed Little Green Gossip Table!

And here he is in all his glory in the natural light the next morning!
I did this project all in one day, and loved every minute of it.
Can't wait to put it in my kitchen, or dining room... TBD.
I did this project all in one day, and loved every minute of it.
Can't wait to put it in my kitchen, or dining room... TBD.
Until next time,
Audra
Audra, this is fantastic. I came upon your blog just minutes ago on fb, so here I am. I think you are still writing the post you talked about, but when I scrolled through I found this one and was thrilled. As you may know we are moving back to Norman, Ok, and I am moving to a home that will cause me to start fresh. I look forward to the challenge on one hand, and dread it on the other, but reading about your passion and ability to paint carefully, patiently, and then even write out the directions totally inspired me and left me smiling. I have a chair that I started painting a few years ago, like when you were in 8th grade. I didn't like my outcome so down in the basement it went. It surfaced today, getting ready for the move, and I'm starring at it. I will buy that "bonding paint" once I get settled and paint a few of my pieces to fit into the new blogger room. You have great skills at technical writing and giving us a picture of what your are talking about. Keep it up, I look forward to your other projects.
ReplyDelete